What are beginner volleyball drills? They build passing, setting, serving, and hitting through low-pressure reps with clear coaching cues. The best beginner drills use simple setups, high touch counts, and progressions that build confidence before adding game complexity. Start with passing and serving, then add setting and hitting.

Beginner Volleyball Drills

New players need reps, not complexity. Beginner drills should maximize touches, use simple language, and build one skill at a time before combining them in game situations.

The drills below are from the SoloCoach library, grouped by skill so youth and rec coaches can run a full fundamentals practice. Start with passing and serving, then add setting and hitting once contact is consistent.

When to run this page

Use this page for the first 4–8 weeks of a season, rec leagues, and any roster where more than half the players cannot pass a tossed ball to a target ten feet away. The practice problem it solves is contact quality, not systems, not transition offense. If you only have 60 minutes, run pairs passing, wall serving, and one small-court game; skip hitting lines entirely.

Start here if players are new to volleyball or under 12. Move to the junior high hub when pairs passing is playable and at least half the roster can serve over the net, not before.

If players are catching more than they pass, stay on Wall Passing and Pairs Passing another week. Movement drills before a stable platform teach bad habits.
Serving belongs in every beginner block, even 10 minutes at the end beats saving it for “when we scrimmage.” Rallies never start without a serve.
Short Court beats full 6v6 for beginners every time. Three players standing on the sideline is not development.
Beginner volleyball pairs passing setup, two players facing each other across a short lane
Pairs passing: keep the lane short so every rep is a clean platform contact.

From the makers of SoloStats

All of these drills are in SoloCoach

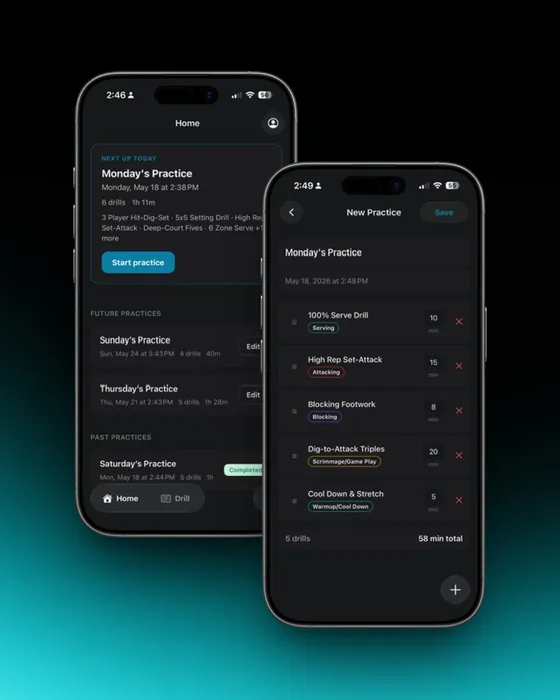
Build a timed beginner practice from this library and run it drill by drill from your phone.

Build your first practice plan, free
SoloCoach app, practice home screen and plan builder

Beginner Warm-up Drills

Simple movement and ball-control warm-ups that get new players touching the ball without teaching a full skill yet.

2 Player Pepper with Sets

2+ playersBalls10 min

Two players run a continuous dig-set-attack sequence between them, incorporating a full set into the standard pepper pattern. Blends skill execution with a warm-up pace that gradually elevates intensity.

  1. Partners stand 10–12 feet apart facing each other.
  2. Player A initiates with an underhand toss. Player B digs up to themselves.
  3. Player B sets the ball above their head, then attacks down at Player A.
  4. Player A digs, sets to themselves, and attacks back at Player B.
  5. Continue the sequence: dig → set → attack → dig. Build pace gradually as the pattern stabilizes.

Coaching Cues

  • The set must go straight up and come back to you, if it drifts, your attack is compromised.
  • Control your attack: aim at your partner's platform zone, not at their face.
  • Warm-up pace means 60–70% effort on the attack, this is about touch, not power.

20-Second Pairs Pepper then Rotate

4+ playersBalls10 min

Pairs pepper for 20 seconds, then rotate to a new partner immediately. High-energy warm-up that introduces every player to every other player in a short window.

  1. All players pair up spread across the gym. Each pair starts with a ball.
  2. On "go," pairs begin pepper: dig → set → attack, controlled.
  3. After exactly 20 seconds, coach calls "rotate", all players drop their ball and move clockwise to the next partner.
  4. New pair picks up the nearest ball and resumes pepper immediately.
  5. Continue rotating every 20 seconds for 5 minutes total.

Coaching Cues

  • Get into rhythm fast, 20 seconds is short. Do not spend 10 of them getting started.
  • Match your new partner's pace immediately. Some partners are faster, some slower, adapt.
  • This warm-up builds team chemistry: intentionally communicate with every partner you rotate to.

4 Player Pepper

4+ playersBalls10 min

Four players run a continuous pepper sequence in a line or square, incorporating all four players into the pass-set-attack chain. More complexity than 2-player pepper, builds multi-player ball control.

  1. Four players form a square or line, 8–10 feet apart.
  2. Player 1 digs to Player 2. Player 2 sets to Player 3. Player 3 attacks at Player 4.
  3. Player 4 digs to Player 3. Player 3 sets to Player 2. Player 2 attacks at Player 1.
  4. Continue the sequence back and forth. All four players rotate roles continuously.
  5. Count consecutive successful sequences (dig → set → attack) without the ball dropping.

Coaching Cues

  • Each player has a defined role at any given moment, know who you're receiving from and delivering to.
  • Keep the attack controlled: your job is to give the next player a diggable ball, not win the point.
  • Communicate: call "mine" on every ball, even in a structured four-player sequence.

Ball Control Circle

5+ playersBalls10 min

Players stand in a circle and keep a ball in the air using any legal contact, passes, sets, overhead contacts, without anyone touching it twice in a row. Cooperative warm-up that builds touch and spatial awareness.

  1. Players form a circle 8–10 feet in diameter.
  2. One player initiates by tossing the ball up into the center of the circle.
  3. Players contact the ball in any order, no player may hit it twice consecutively.
  4. The goal is to keep the ball alive as long as possible without it hitting the floor.
  5. Add a second ball once the group reaches 15 consecutive contacts with one ball.

Coaching Cues

  • Call "mine" or point at the ball before contacting, ambiguity with a group leads to everyone watching.
  • Direct your contact toward an open player, not just anywhere upward.
  • Stay engaged even when you're not the next contact, you might be two contacts away.

High 5 Contest

2+ playersBalls10 min

Partners face each other and compete to give the most high-fives using their platform, passing the ball back and forth at high-five height. A playful warm-up format that builds platform control and cooperative focus.

  1. Partners stand 6–8 feet apart. One partner starts with the ball.
  2. Partner A tosses the ball to partner B at shoulder height.
  3. Partner B passes the ball back to partner A's "high five zone", at partner A's raised hand level.
  4. Partner A receives and passes it back at the same height.
  5. Count consecutive exchanges at the correct height. Drop or wrong height resets the count.

Coaching Cues

  • Platform angle must point upward and toward your partner, flat platforms send the ball down.
  • The target is your partner's raised hand, not their face, not their feet. Be accurate.
  • The "contest" part matters: compete to beat your own best consecutive count every round.

No Ball Movement

1+ playersNone10 min

A physical warm-up drill performed entirely without a ball, players execute volleyball movements (shuffle steps, defensive drops, jump approaches) on coach's commands. Prepares the body without the cognitive load of ball-handling.

  1. Players spread out across the court in base defensive positions.
  2. Coach calls out movements in sequence: "shuffle left," "drop right," "jump approach," "dive recovery," etc.
  3. Players execute each movement with full effort, no half-speed warm-up movement.
  4. Include: lateral shuffles, back-pedals, forward sprints, jump approaches at each position, and defensive drops.
  5. Run for 5–8 minutes, increasing the pace and complexity of commands toward the end.

Coaching Cues

  • Warm-up without a ball does not mean warm-up without intensity, move every joint through its full range.
  • Use this to mentally rehearse: picture the game situation as you execute each movement.
  • Coaches: vary commands unpredictably to keep players reactive, not just mechanically following a pattern.

Pass Set Hit Shuttle Warmup

6+ playersBalls10 min

Players move through three stations in a shuttle pattern, passing, then setting, then hitting, in a continuous warm-up flow that touches all three major skills before practice begins.

  1. Set up three stations: Station 1 (passing pairs), Station 2 (setting wall or to a target), Station 3 (controlled hitting line).
  2. Players rotate through all three stations, spending 2 minutes at each.
  3. Station 1: partners pass back and forth, building rhythm.
  4. Station 2: setter delivers sets to a target, consistent form, light effort.
  5. Station 3: hitters take half-effort approach swings against a tossed ball.

Coaching Cues

  • Warm-up means gradual, start at 50% effort in Station 1 and arrive at 80% in Station 3.
  • Do not skip the mental engagement at each station. Focus on your technique, not just getting the reps done.
  • Coaches: watch for technique errors during warm-up, they are easier to correct here than mid-drill.

Throw and Catch

2+ playersBalls10 min

Players throw and catch the ball to each other using overhand and underhand throws, warming up shoulders and hands before transitioning to volleyball contacts. A low-impact start for any practice session.

  1. Partners stand 10 feet apart facing each other.
  2. Player A throws overhand to Player B, who catches and throws back.
  3. After 10 throws each, switch to underhand throws.
  4. After 10 underhand throws, switch to behind-the-back tosses (casual, fun finish).
  5. Gradually increase distance to 20 feet across the sequence.

Coaching Cues

  • Use full arm extension on overhand throws, warm up the shoulder through its full range.
  • Catch with soft hands, the catch mechanic reinforces the "quiet hands" feel needed in setting.
  • Keep it light and social, this is the first 5 minutes of practice. Loose, not tense.

Beginner Passing Drills

High-rep passing drills with simple setups. Start here, passing is the skill beginners need most.

3 Players In a Row

3+ playersBalls10 min

Three players stand in a line and pass the ball down the line and back. Simple repetition drill for beginners building platform fundamentals and communication habits.

  1. Three players line up in a row, each spaced about 8 feet apart.
  2. Player 1 passes to Player 2, who passes to Player 3.
  3. Player 3 passes back to Player 2, who passes back to Player 1.
  4. Repeat continuously, focus on controlled, chest-height passes each time.
  5. Add a light shuffle step before each pass to simulate movement.

Coaching Cues

  • Platform should be locked and angled before the ball arrives, no last-second arm swings.
  • Bend your knees and keep your weight forward so your legs drive the pass, not your arms.
  • Call every ball with a loud "mine", even in a 3-person line.

Bounce Pass Hit

2+ playersBalls10 min

A foundational drill where partners toss a ball, let it bounce, and then pass it on the second bounce. Slows down the contact moment to help beginners build platform mechanics.

  1. Partners stand 8–10 feet apart facing each other.
  2. Player A bounces the ball firmly on the floor toward Player B.
  3. Player B lets the ball bounce once, then passes it back on the rise using a forearm platform.
  4. Alternate roles after every 5 passes.
  5. Progress by reducing the bounce height and increasing the pass speed.

Coaching Cues

  • Get behind the ball and low before it bounces, don't reach for it as it rises.
  • Contact the ball on the way up, not at the peak, the rising ball gives you more control.
  • Keep your elbows straight and platform flat; this is all about the shape of your arms.

Crisscross Passing

4+ playersBalls10 min

Two lines of players pass diagonally across the court, crossing paths after each pass. Trains spatial awareness, timing, and platform consistency while players are in motion.

  1. Form two lines on opposite sides of the court, one on the left, one on the right.
  2. Player 1 from Line A passes diagonally to Player 1 from Line B.
  3. Both players then cross to the opposite line after their pass.
  4. Next players in each line step up and repeat the crossing pass.
  5. Keep the sequence continuous, the next pair goes as soon as the previous crosses.

Coaching Cues

  • Pass first, then move, players who move before passing sacrifice platform control.
  • Make eye contact with your passing partner before the ball leaves your platform.
  • Adjust your angle based on where your partner is standing, not where they started.

Pairs Passing Game

2+ playersBalls10 min

Two players face each other and pass continuously, counting consecutive passes. A simple high-repetition drill to build platform fundamentals and rhythm.

  1. Partners stand 8–10 feet apart facing each other.
  2. One player initiates with a controlled underhand toss.
  3. Pass back and forth, counting consecutive passes without the ball hitting the floor.
  4. When the ball drops, reset and try to beat your previous record.
  5. Gradually increase distance to 15 feet as control improves.

Coaching Cues

  • Platform should be set before the ball arrives, no scooping or last-second arm swings.
  • Use your legs to generate direction; your arms are a platform, not a swing.
  • Aim every pass at your partner's chest, consistency builds confidence.

Triples Pass Drill

3+ playersBalls10 min

Three players work in a tight triangle, passing continuously with short, controlled contacts. Emphasizes soft hands and precise platform angles in a small-space format.

  1. Three players form a tight triangle, 6–8 feet apart.
  2. One player initiates the ball with an underhand toss.
  3. Players pass to any other player in the triangle, keeping the ball in constant motion.
  4. Count consecutive passes without the ball hitting the floor.
  5. Add a rule: ball must be passed within 2 seconds of reception to increase tempo.

Coaching Cues

  • Short distance means less time, get your platform ready early or you'll be late.
  • Pass accurately: with only 6 feet of space, a bad pass immediately breaks the pattern.
  • Stay square to the triangle center; turning sideways limits your passing options.

Beginner Serving Drills

Toss, contact, and target work that isolates the serve motion before adding pressure.

6 Zone Serve

1+ playersBalls, Cones10 min

The court is divided into 6 numbered zones. Coach calls a zone number and the server must target it immediately. Develops serve placement on command and builds court spatial awareness.

  1. Divide the opposite court into 6 zones with cones: 3 deep (1, 2, 3) and 3 short (4, 5, 6).
  2. Server stands at the baseline with a supply of balls.
  3. Coach calls a zone number just before the server begins their serving motion.
  4. Server must land the ball in the called zone.
  5. Track hits vs. misses per zone to identify weaker placement areas.

Coaching Cues

  • Know where all 6 zones are before you start, hesitating on the zone number costs you your toss.
  • Adjust your body angle slightly toward the target zone before your toss, not after.
  • Beginners: master the deep zones first. Short serves require precise net clearance and are harder to control.

Arm and Wrist Snap Bounce Drill

1+ playersBalls10 min

Players practice the arm swing and wrist snap of their serve motion by hitting a ball bounced off the floor, isolating the contact mechanics without a full serving motion.

  1. Player stands at the service line with one ball.
  2. Bounce the ball firmly on the floor directly in front of you.
  3. As it rises to peak height, swing through it with a full arm extension and wrist snap, as if serving.
  4. Focus on the snap of the wrist over the top of the ball at contact.
  5. Repeat 15–20 times, then transition to a full serve and feel whether the snap carries over.

Coaching Cues

  • Contact the ball at the peak of the bounce, late contact means your arm is already decelerating.
  • Snap your wrist over the top of the ball, not around it; this generates topspin and keeps the ball in.
  • Full arm extension before the snap, a bent elbow at contact reduces power and accuracy.

Wall Serving Drill

1+ playersBalls10 min

Players practice their serving motion against a wall target, focusing on arm swing mechanics, wrist snap, and contact point without the variability of a full-court setup.

  1. Mark a target zone on a flat wall at net height (approximately 7.5 feet from the floor).
  2. Player stands 20–25 feet from the wall and serves into the target.
  3. Focus on a consistent ball toss, full arm extension, and firm contact.
  4. Complete 3 sets of 10 serves each, resting 30 seconds between sets.
  5. Vary serve type: alternate float serves (no follow-through) and topspin serves (wrist snap over).

Coaching Cues

  • The wall gives instant feedback, a weak arm swing produces a ball that falls short; fix the swing.
  • Toss the ball slightly in front of your hitting shoulder, not directly overhead.
  • Stand still during the toss, stepping forward before your arm swings disrupts your contact point.

Beginner Setting Drills

Hand-setting basics that build a stable base and soft hands before adding tempo.

Set To Self Drill

1+ playersBalls10 min

Setter repeatedly sets the ball to themselves, moving, repositioning, then setting again. Isolates hand technique and footwork in a self-directed format that requires no partner.

  1. Setter starts with a ball in their hands, tossed lightly above their forehead.
  2. Set the ball 8–10 feet high, move 3 steps laterally, then set again before the ball lands.
  3. Continue moving and setting without the ball touching the floor.
  4. After 10 consecutive sets, add a directional target: set toward the wall or a cone each time.
  5. Count max consecutive sets, track personal best and compete session to session.

Coaching Cues

  • Both hands must contact simultaneously, one-handed pushes are a habit that kills consistency.
  • Contact the ball above your forehead with fingers spread wide; thumbs pointing toward your face.
  • Move your feet to get under the ball, reaching overhead without footwork builds bad mechanics.

Wall Setting Drill

1+ playersBalls10 min

Setter repeatedly sets into a wall target at net height, receiving the ball back off the rebound and setting again. Builds hand strength, touch, and repetition volume without a partner.

  1. Mark a target on a flat wall at approximately 8–9 feet high (net height) and 2 feet wide.
  2. Stand 6–8 feet from the wall and set the ball into the target.
  3. As it rebounds back, set it again immediately, do not let it drop.
  4. Count consecutive successful sets into the target zone.
  5. Increase difficulty: step back to 10 feet, or move laterally between each set.

Coaching Cues

  • Soft hands produce a ball that comes straight back at you; stiff hands produce unpredictable rebounds.
  • The wall is honest, a poor set bounces back poorly. Use the feedback instead of ignoring it.
  • Do not use a follow-through that pushes the ball downward, the ball should arc up into the target.

Beginner Hitting Drills

Arm-swing and contact drills that teach hitting mechanics without a live set.

Wall Hit Drill

1+ playersBalls10 min

Hitters practice their arm swing and contact mechanics against a wall target. No ball toss variability, pure repetition of the hitting motion and contact point.

  1. Mark a target on the wall at approximately 9–10 feet high, 3 feet wide.
  2. Player stands 10–12 feet from the wall with a ball.
  3. Toss the ball slightly in front and above your hitting shoulder, then swing and contact into the target.
  4. The ball will rebound back, catch it and repeat.
  5. Complete 3 sets of 15 reps, focusing on consistent contact point and arm swing path.

Coaching Cues

  • Toss the ball up and slightly forward, do not toss straight overhead, which forces your elbow behind your ear.
  • Swing from high elbow to full extension at contact, elbow leads, hand follows.
  • The wall gives honest feedback: a mis-hit bounces unpredictably. Use it to identify your bad-contact patterns.

Wrist Snap Bounce Drill

1+ playersBalls10 min

Hitters stand at the attack line and smash balls into the floor, focusing on the wrist snap and downward angle that produces topspin and steep attack trajectories.

  1. Player stands at the 3-meter attack line with a supply of balls.
  2. Toss the ball slightly above and in front of your hitting shoulder.
  3. Swing and contact the ball with a sharp wrist snap, driving it into the floor in front of you.
  4. The ball should bounce high and away, a proper snap produces a steep downward angle.
  5. Complete 20 reps focusing on the snap, then transition to the net and apply the same snap in attacks.

Coaching Cues

  • Snap your wrist over the top of the ball, not around it, to produce a downward trajectory.
  • A flat hand at contact produces a flat ball. A snapping wrist produces a steep, hard-to-dig attack.
  • This drill is about feel: close your eyes after 10 reps and focus on what your wrist is doing at contact.

Beginner Blocking Drills

Footwork first. Beginners learn the slide step and net posture before jumping to block live attacks.

Basic Slide Drill

2+ playersNone10 min

Blockers practice the slide step pattern along the net, the fundamental footwork used to close a block or shift from one blocking position to another. Builds the lateral quickness and hip alignment that underpins all net defense.

  1. Line up blockers along the net in an athletic ready stance, hands raised to blocking height.
  2. On coach's signal, player slide-steps laterally along the net for 3–5 steps without crossing feet.
  3. At the end of the slide, player jumps and presents hands above the net as if blocking.
  4. Return with a slide in the opposite direction and repeat.
  5. Progress to cross-over steps for longer distances once the slide is clean.

Coaching Cues

  • Keep hips square to the net throughout, turning sideways makes your jump slow and your block angle wrong.
  • Stay on the balls of your feet the entire time; flat feet kill your lateral reaction speed.
  • Arms stay raised and ready in blocking position during all movement, lowering them mid-slide costs you the block.

Beginner Defense Drills

Low posture and platform control off tossed or down balls, not live swings yet.

Cross-Court Dig

2+ playersBalls10 min

Defenders practice digging balls hit cross-court, the most common attack direction in volleyball. High-volume repetition drill focused on reading the cross-court angle and positioning platform correctly.

  1. Attacker at position 4. Defender at position 1 (right back).
  2. Attacker hits cross-court angle every rep.
  3. Defender reads the attack direction and digs the ball up to a target zone.
  4. Run 15 reps, then switch the attacker to position 2 (right side) and defender to position 5 (left back).
  5. Track: how many digs landed in the target zone versus just keeping the ball in play?

Coaching Cues

  • Position yourself slightly toward the cross-court angle before the attack, pre-position, do not react.
  • Platform angle points toward the setter target, not where the ball came from.
  • Read the hitter's shoulder at the peak, if it's opening toward you, expect cross-court.

Partner Dig Toss

2+ playersBalls10 min

Partners alternate tossing and digging in a controlled format, allowing the defender to focus entirely on platform mechanics without the unpredictability of a live attack.

  1. Partner A stands 10–12 feet from Partner B and tosses balls firmly and consistently to B's platform zone.
  2. Partner B digs each ball back to A using a forearm platform.
  3. After 15 digs, switch roles.
  4. Toss variations: direct, slightly left, slightly right, and low (requires B to bend lower).
  5. Focus for the digger: platform angle, leg drive, and consistent contact height.

Coaching Cues

  • Dig with your legs, a flat-armed dig that relies only on arm swing is weaker and less accurate.
  • Platform angle at contact determines direction, point it at your partner before the ball arrives.
  • Call "ready" between each toss so your partner knows when to send the next ball.

Shuffle Slide Drill

2+ playersBalls10 min

Defenders perform lateral shuffle steps in their defensive stance, then stop and dig on the coach's signal. Builds the connection between defensive footwork and platform setup under lateral movement.

  1. Defender starts at center back in a low defensive stance.
  2. Coach signals a direction: defender shuffle-slides left or right along the back line.
  3. On coach's cue ("now"), defender stops immediately and digs the tossed ball.
  4. Reset to center. Repeat with varying distances and directions before the cue.
  5. Run 15 reps, progressively increasing the shuffle distance before the cue.

Coaching Cues

  • Shuffle with your knees bent throughout, straightening up between shuffles means you start each dig too high.
  • Stop before you dig, digging while still sliding sends the ball sideways, not up.
  • Platform must be set and angled in the same motion as your stopping step, simultaneous, not sequential.

Standing Dig Drill

2+ playersBalls10 min

Defenders practice digging from a stationary, standing position, focusing entirely on platform mechanics and contact quality without any footwork variable. Ideal for beginners building their first dig habits.

  1. Defender stands in a basic athletic stance, feet shoulder-width apart, 10–12 feet from the net.
  2. Partner or coach tosses balls directly to the defender's platform zone.
  3. Defender digs each ball up using proper forearm platform technique, no footwork required.
  4. Focus: platform shape, contact point (forearms, not wrists), and direction of dig.
  5. Run 20 reps. Then add one step of footwork (left or right) before each toss.

Coaching Cues

  • Arms must be straight and locked at the elbows, bent elbows create an inconsistent contact surface.
  • Contact should land on the flat of your forearms, not on your wrists or hands.
  • Angle your platform toward the target before the ball arrives, do not aim by swinging your arms.

Wall Digs

1+ playersBalls10 min

Defenders repeatedly dig a ball against a wall and react to the rebound in a continuous self-feeding loop. Builds platform consistency, forearm strength, and reactive hand-eye coordination.

  1. Player stands 5–8 feet from a flat wall in a low defensive stance.
  2. Initiate with a firm throw or dig into the wall at roughly shoulder height.
  3. React to the rebound and dig it back into the wall using a forearm platform.
  4. Continue without the ball hitting the floor. Count consecutive digs.
  5. Vary depth: step back 1 foot every 10 consecutive digs to make the wall rebound faster and harder.

Coaching Cues

  • Stay low between contacts, straightening up makes the rebound arrive before you're set.
  • Dig into the same spot on the wall every time; random aim produces random rebounds.
  • Focus on platform consistency, not raw numbers, 15 clean digs beats 25 sloppy ones.

Beginner Games Drills

Small-court games that keep rallies alive while beginners are still building skills.

Short Court Game

4+ playersBalls15 min

Teams compete on a shortened court (front half), emphasizing net play, tips, roll shots, and sharp angles. Removes back-row defense and isolates front-court skills in a game format.

  1. Use only the front half of the court, from the net to the attack line on each side.
  2. 2v2 or 3v3. All plays must land between the net and the attack line.
  3. Attacks that land past the attack line are out. Ball must go over the net on every contact.
  4. Normal rally scoring to 15.
  5. Focus: tips, roll shots, sharp angles, and net plays, power attacks go out on a short court.

Coaching Cues

  • Soft hands win on a short court, attacking hard lands out of bounds every time.
  • Tips should land 2–3 feet past the net, not 6 inches. Short tips are easy to dig.
  • Front-court defense means being up, alert, and ready to move forward at all times.

Small Court Game

4+ playersBalls15 min

Compact court competition that forces players to be creative and precise with attacks and defense. Develops touch, decision-making, and ball control in a constrained space.

  1. Reduce the court to 4x4 meters per side using cones or boundary lines.
  2. 2v2 teams compete with standard volleyball rules (3 contacts per side).
  3. Power attacks that land out count as errors, placement wins points.
  4. Play rally scoring to 15. Vary court size between rounds as skill develops.
  5. Add a rule: ball must go over the net with at least 2 feet of clearance to reward controlled play.

Coaching Cues

  • Small court = less margin for error. Tight serves and sharp tips are your weapons.
  • Defense wins on a small court: be low, stay alert, and cover the corners.
  • Attack placement, not power, the boundary lines punish recklessness immediately.

Split Court Doubles Games

4+ playersBalls15 min

Standard 2v2 competition on a split half-court. Compact format that maximizes contacts per player and forces every player to be involved in every phase of play.

  1. Split the court into two long, narrow halves. Two pairs compete simultaneously on each half.
  2. Standard 2v2 volleyball rules, 3 contacts per side, rally scoring.
  3. One player serves from the baseline. Alternate serve every 5 points.
  4. Play to 15 points. Rotate partners between games to expose players to different dynamics.
  5. Coaching points: communication, role clarity (who sets, who hits), and defensive coverage.

Coaching Cues

  • Communicate your role before every ball: "I've got it" or "yours", no silent duos.
  • On offense: the non-attacking player must cover behind the hitter immediately.
  • On defense: split the court, each player owns one side. No drifting into your partner's zone.

Split Court Doubles Pepper Game

4+ playersBalls10 min

Doubles pairs play pepper on one half of the split court, competing with the other pair in the adjacent half. Adds competitive stakes to what is typically a cooperative warm-up activity.

  1. Split the court lengthwise. One pair on each half.
  2. Each pair plays pepper: dig → set → attack (down-controlled) → dig → repeat.
  3. Both pairs count consecutive sequences simultaneously. First pair to drop the ball loses a point.
  4. Race to 15 consecutive sequences first, opponent gets a point every time you drop.
  5. Switch partners between rounds.

Coaching Cues

  • Pepper is cooperative, but competing adds accountability, do not let your partner down.
  • Control your attack: the goal is to keep the rally alive, not to kill your partner's dig.
  • Count out loud, tracking your own score builds focus during repetitive activity.

Beginner Scrimmage Drills

Modified scrimmage formats that maximize contacts for new players.

Small Volleyball Drill

4+ playersBalls15 min

Players compete on a very small modified court using a smaller or lighter ball. Builds touch, precision, and court awareness in an exaggerated small-space format.

  1. Set up a 3x3 meter court per side (or use a badminton court).
  2. 2v2 using a light training ball or a standard ball with lower inflation.
  3. Three contacts mandatory. All rules standard except court size.
  4. Rally scoring to 11. Switch partners between games.
  5. Coaching focus: footwork, positioning, and shot selection in a restricted space.

Coaching Cues

  • Small court trains precision, every ball must be intentionally placed, not just hit.
  • Footwork matters more on a small court: you cannot make up for poor positioning with a long reach.
  • This format builds touch. Resist the urge to overpower the ball, control wins here.

How to Run a Beginner Volleyball Practice

  1. Step 1

    Week 1–2: platform only. Wall Passing and Pairs Passing with no movement, goal is 10 consecutive passes without a catch.

  2. Step 2

    Week 3: add serving and one movement drill (Bounce Pass Hit or short toss-and-go). Still no full-court scrimmage.

  3. Step 3

    Week 4+: small-court game (Short Court or Split Court Doubles) after passing and serving blocks. Add Wall Setting only when pass-to-target is consistent.

  4. Step 4

    If time is short, cut hitting and setting, never cut passing, serving, or the small-court finish.

Beginner Volleyball Drills, Frequently Asked Questions

What volleyball drills work best for 10–12 year olds?
Pairs Passing, Wall Serving, and Short Court. Keep groups of two or three so every player touches the ball every 15 seconds. Avoid full 6v6 until pass-and-serve is playable.
What are the best volleyball drills for beginners?
Pairs Passing Game, Bounce Pass Hit, Wall Serving Drill, Set To Self Drill, and Wrist Snap Bounce Drill. Each uses a simple setup, high touches, and one coaching focus. Add a small-court game at the end so beginners connect skills to rallies.
How do you structure a beginner volleyball practice?
Warm-up (10 min), passing (15–20 min), serving (10–15 min), one other skill (setting or hitting), then a small-court game. Keep instructions short and rotate quickly. Standing in a single-file line is the fastest way to lose a beginner group.
How many players do you need for beginner volleyball drills?
Most of the drills on this page work with 1–4 players. Wall drills and Set To Self work with one. Pairs Passing and partner digs need two. Small-court games need four. You can run a full beginner practice with a tiny roster.
Should beginners scrimmage 6v6?
Not at first. Full-court 6v6 produces a few contacts for the better athletes and standing around for everyone else. Short Court Game and Split Court Doubles give more touches and simpler reads.
How long should a youth volleyball practice be?
Sixty to ninety minutes. Short and focused beats long and unfocused. If attention drops, switch to a small-court game rather than adding another technique lecture.
    Beginner Volleyball Drills, Fundamentals for New Players | SoloCoach